Customizing Go Binaries with Build Tags 🛠
Using build tags for additional functionalities in LND ⚡
Getting Started With Build Tags 💡
A build tag is an identifier in Go that helps to create different binaries by including certain files during the build process. This allows us to build different versions of our Go application from the same source code and also eases the process of toggling between different versions. Build tags are mainly used to develop cross-platform applications where the programs require code changes to account for variances between different operating systems. Build tags are also used for integration testing, allowing us to quickly switch between the integrated code and the code with a mock service or stub, and for differing levels of feature sets within an application.
To understand it better, let's take the example of different customer features in an app for Free, Premium and Enterprise users. As the customer upgrades to more premium versions, more features gets unlocked and become available to use. To solve this problem, you could maintain separate projects and try to keep them in sync with each other through the use of import statements. While this approach would work, but over time it would become difficult for the developers to maintain different projects and keep them integrated and in sync. Thus this approach has more overhead and becomes error prone. An alternative approach would be to use build tags, and this is what we'll be discussing in this blog. We'll try to generate different executable binaries that offer Free, Premium & Enterprise feature sets of a sample application. Each will have a unique set of features with the Free version as the default.
Building the Free version 🔭
First we'll create a default app that is the Free version of our application. Later on, we'll use the build tags to add other parts to our program.
In the src directory of your GOPATH create a new folder app and move into it. There create a new file main.go.
mkdir app
cd app
touch main.go
Open main.go in a text editor(I prefer VS code) and add the following code to it.
package main

import "fmt"

var features = []string{
  "Free Feature #1",
  "Free Feature #2",
}

func main() {
  for _, feature := range features {
    fmt.Println(feature)
  }
}
In this file we created a slice of string representing the features of Free version. In the main function we called the print function to print the features. Now save the file, build it and run it.
go build
./app
The output will be:
Free Feature #1
Free Feature #2
The program has printed out our two free features, completing the Free version of our app.
So far, we have created an application that has a very basic feature set. Next, we will build a way to add more features to the application at build time.
Adding Premium Features With go build 🪄
Now we'll try to add more features to our application or in other words add more feature strings in our features slice. Since we are trying to simulate a production environment we should not edit the main.go file directly, so we'll have to use other mechanism for injecting more features using the build tags.
Let’s create a new file called premium.go that will use an init() function to append more features to the features slice:
touch premium.go

// open in vs code
code premium.go
Add the following code to this file:
package main

func init() {
  features = append(features,
    "Premium Feature #1",
    "Premium Feature #2",
  )
}
In this code, we used init() to run code before the main() function of our application, followed by append() to add the Premium features to the features slice. Save and exit the file.
Compile and run the application using go build:
go build
./app
Since now there are 2 files in our current directory(main.go & premium.go), go build will create a combined binary for both of them.
The output will be:
Free Feature #1
Free Feature #2
Premium Feature #1
Premium Feature #2
As you can see in the output, the current application includes both Free and Premium features. But this is certainly not the desired output as the free version also contains the premium features. To fix this we'll add the build tags to tell the Go tool chain which .go files to build and which to ignore.
Adding Build tags ⚙️
Now we'll use the build tags to distinguish the Premium and Free version of our app.
To add a build tag, add the following line on the top of your file:
// +build tag_name
By putting this line of code as the first line of your package and replacing tag_name with the name of your build tag, you will tag this package as code that can be selectively included in the final binary. Let’s see this in action by adding a build tag to the premium.go file to tell the go build command to ignore it unless the tag is specified. Open up the file in your text editor:
// +build premium

package main

func init() {
  features = append(features,
    "Premium Feature #1",
    "Premium Feature #2",
  )
}
At the top of the premium.go file, we added // +build premium followed by a blank newline. This trailing newline is required, otherwise Go interprets this as a comment.
The +build declaration tells the go build command that this isn’t a comment, but instead is a build tag. The second part is the premium tag. By adding this tag at the top of the premium.go file, the go build command will now only include the premium.go file when the premium tag is present.
Build and run the application again:
go build
./app
Output:
Free Feature #1
Free Feature #2
As you can see in the output, now we don't get the premium features in free version. This happens because the premium.go file is ignored since we didn't specify the premium tag. To get the premium version we'll rebuild the app with premium tag:
go build tags="premium"
./app
This time the output will be:
Free Feature #1
Free Feature #2
Premium Feature #1
Premium Feature #2
Now we also get the extra features when we build the application using the premium build tag.
Build Tags Boolean Logic ✍🏼
When there are multiple build tags in a Go package, these tags interact with each other using Boolean logic. To see it in action we'll add the Enterprise level of our application using both premium and enterprise tag.
So create a new file enterprise.go and add the following code:
// +build enterprise

package main

func init() {
  features = append(features,
    "Enterprise Feature #1",
    "Enterprise Feature #2",
  )
}
Running with enterprise tag will give:
Free Feature #1
Free Feature #2
Enterprise Feature #1
Enterprise Feature #2
But we also want the premium features in enterprise version. To get this we'll also add the premium tag to enterprise like:
// +build enterprise
// +build premium

package main

func init() {
  features = append(features,
    "Enterprise Feature #1",
    "Enterprise Feature #2",
  )
}
When we put both tags on the same line eg: // +build enterprise premium go build interprets them as using OR logic. So this file will compile with both premium and enterprise tag. But we don't want this file to be compiled only with premium tag so instead we want to have the AND logic and for that we put both tags in separate lines(or comma separated).
Build again:
go build -tags "enterprise premium"
./app
We'll get the following output:
Free Feature #1
Free Feature #2
Enterprise Feature #1
Enterprise Feature #2
Premium Feature #1
Premium Feature #2
Now our application can be built from the same source tree in multiple ways unlocking the features of the application accordingly.
Using Build Tags In LND 🏄🏻♂️
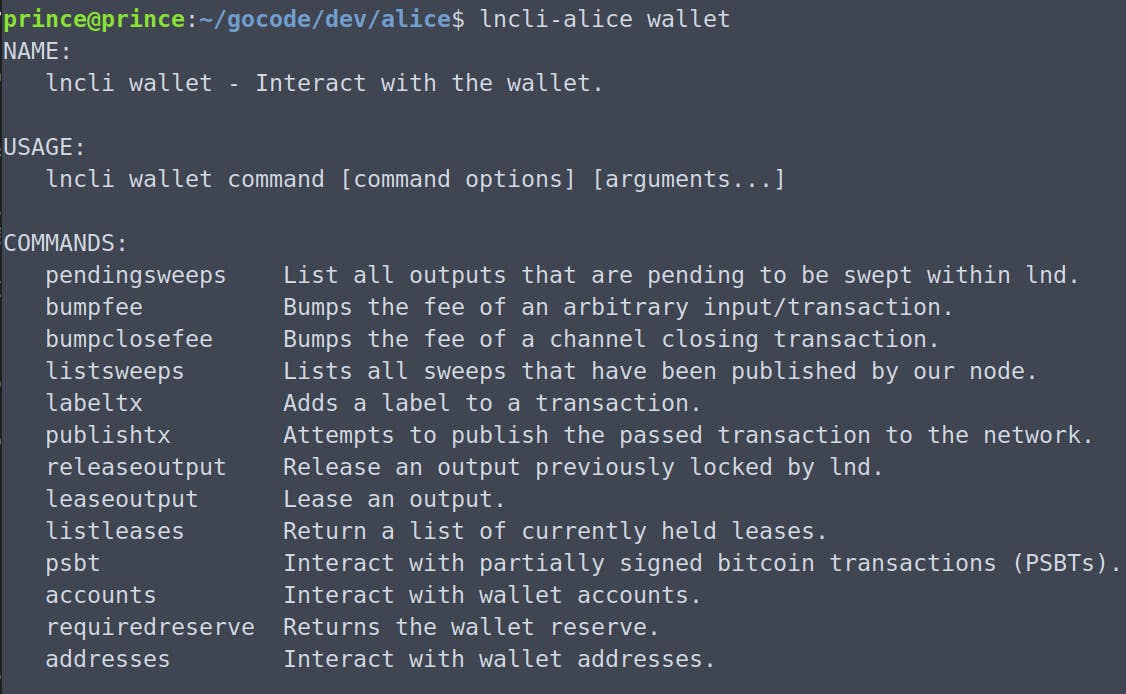
Lightning Network Daemon or LND uses multiple build tags to provide different functionalities to the users. Some of them are walletrpc that helps to interact with the wallet, accounts and addresses & watchtowerrpc which provides all the commands to access information related to watchtowers(Not sure about watchtowers? Detailed blog coming soon 😉).
Checkout my blog to learn more about Lightning Network & LND.
Can't access the wallet with default build:

Building the binaries with walletrpc tag:

Now we can access the wallet features:

Conclusion 💁
In this blog we learnt about build tags, how they control which part of code to compile, boolean logic of tags and also saw production level usage of tags in LND.
Hope the blog was helpful! Cheers! ✌️🚀
